Have you ever considered that light is not just a tool for illumination, but a powerful piece of art that changes the soul of a room? Reaching from the mystical atmosphere of ancient palaces centuries ago to the present day, the turkish handmade lamps tradition has evolved into the breathtaking mosaic lamp centerpieces we see in modern homes today.

However, the greatest feature of these turkish handmade lamps is not just their aesthetic appeal; it is the rich cultural history and the unparalleled quality of the materials used to create every single mosaic lamp. At Pedalisa Art, we are dedicated to keeping this deep-rooted heritage alive. In this guide, we will explore the fascinating mosaic art definition, the secret meanings behind its patterns, and how to identify true, authentic materials.
Explore the Heritage
The Historical Journey of Turkish Mosaic Art
To truly appreciate these pieces, one must understand the mosaic definition art historians often highlight: the technique of creating images with an assemblage of small pieces of colored glass, stone, or other materials. This mosaic art definition has been a tradition in Anatolian lands for thousands of years, long before the invention of modern electricity.
However, glass turkish handmade lamps reached their pinnacle of beauty and craftsmanship during the Ottoman Empire, an era where glassmaking (known as Camgeran) was highly respected. Master artisans would meticulously cut colored glass and arrange them into stunning geometric patterns. Today, whether you attend a mosaic lamp workshop or buy a finished piece, you are holding a centuries-old cultural legacy.
The Hidden Meanings Behind the Patterns
A true mosaic lamp is never random. Every color and pattern placed on the glass globe of these turkish handmade lamps carries a symbolic meaning passed down through generations:
- The Star Motifs: Often designed with 6 or 8 points, these stars symbolize the infinity of the universe, cosmic balance, and spiritual direction.
- The Tulip Figures: Deeply embedded in Ottoman culture, the tulip represents elegance, perfection, and mystical love.
- Geometric Swirls: Representing the continuous flow of time and water, these patterns bring a dynamic energy to the room.

Want to Build Your Own Piece of History? 🛠️
You don't need to be a master glassmaker from the 16th century to create one of these stunning turkish handmade lamps. We have created the ultimate, step-by-step DIY guide that teaches you exactly how to craft your own mosaic lamp masterpiece at home.
Read the Ultimate DIY Tutorial HereHow to Identify Authentic Materials
Choosing the right material is vital for a flawless result. The market is flooded with cheap imitations, but the true mosaic definition art standards require high-quality components. Poor quality glass dulls the light of a mosaic lamp, and bad glue causes hard work to fall apart over time.

Here is what makes Pedalisa Art turkish handmade lamps materials superior and authentic:
- Original Colored Glass (Not Painted): Authentic tesserae are cut from glass that was dyed during manufacturing. This is the core of the mosaic art definition. Original glass keeps its vibrant color forever.
- Heat-Resistant Glass Globes: The main body of the mosaic lamp must be thick and tempered to withstand the heat of the light bulb without cracking.
- Specialized Silicone Adhesive: You can never use hot glue for a mosaic lamp. We supply a specialized silicone-based craft glue that dries completely transparent.
- Traditional Metal Hardware: The base and crown caps should be made of durable metals like brass or copper with an antique finish, honoring the traditional aesthetic.

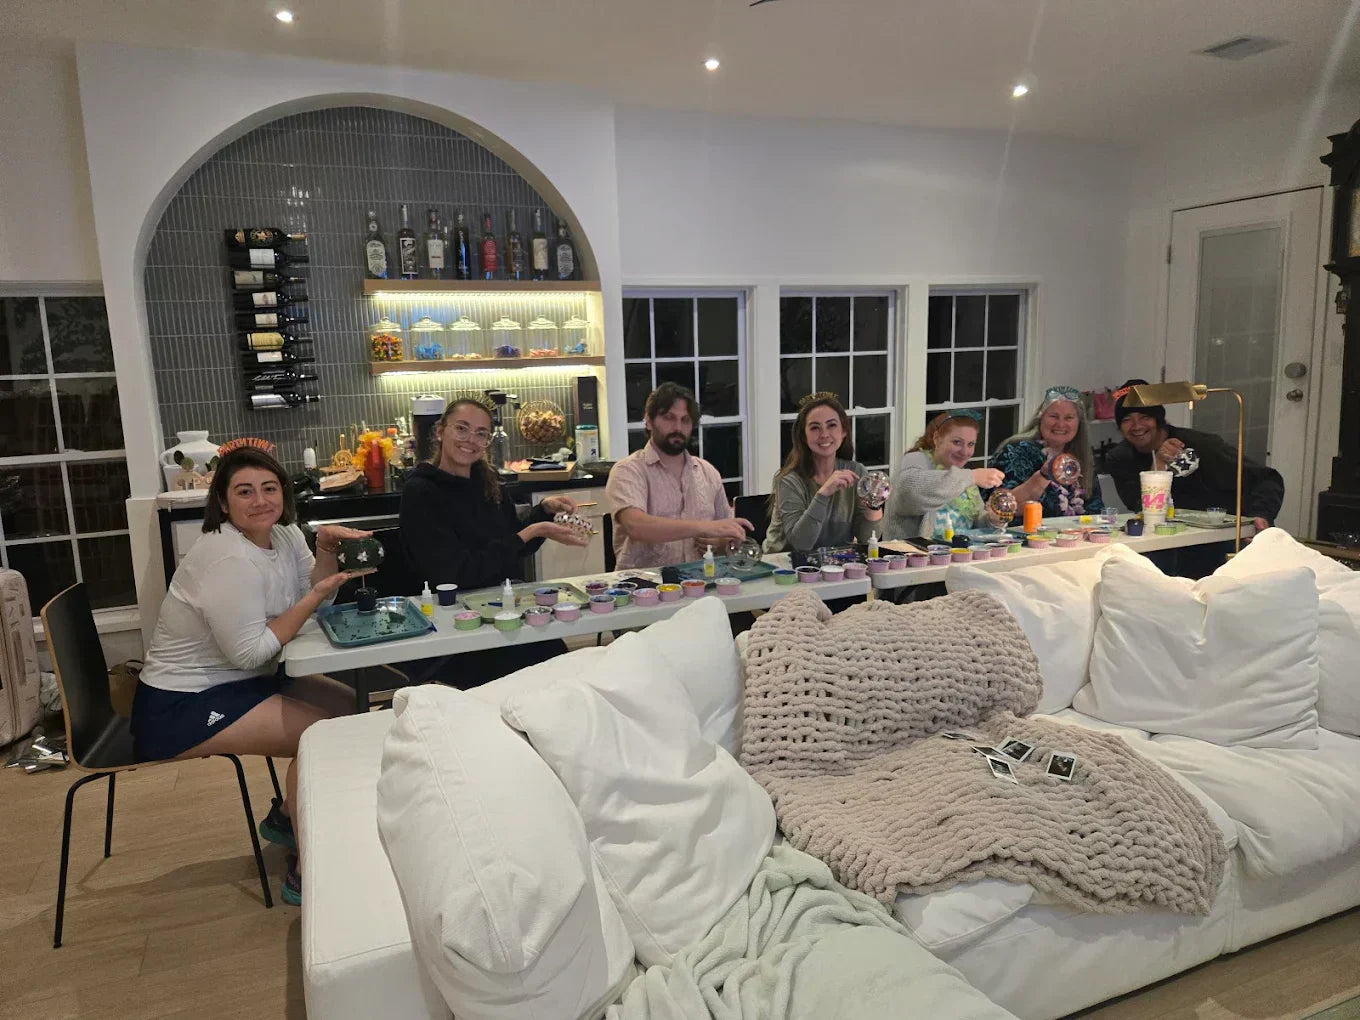
Host a Historic Crafting Experience 🕌
Are you looking for a culturally rich activity? Our mosaic lamp workshop is perfect for corporate team-building events, birthdays, or private gatherings. Let Pedalisa Art bring the magic of turkish handmade lamps directly to your group with expert instructors and premium materials.
Explore Private Group EventsAdding a Historic Touch to Modern Decor
When you place an authentic, handcrafted mosaic lamp in your home, it bridges the gap between ancient artistry and modern design.

Whether it acts as ambient light or a night light, the turkish handmade lamps transform the entire atmosphere. The intricate geometric shadows cast by a mosaic lamp provide a unique soul to any space.
Experience the Legacy
Bring the authentic beauty of turkish handmade lamps into your life. Shop our premium kits or join an expert-led mosaic lamp workshop.
Frequently Asked Questions
Why is original colored glass better for a mosaic lamp?
Original colored glass has the pigment mixed into it during production, meaning it will never fade. This is essential for turkish handmade lamps to maintain their brilliance for decades.
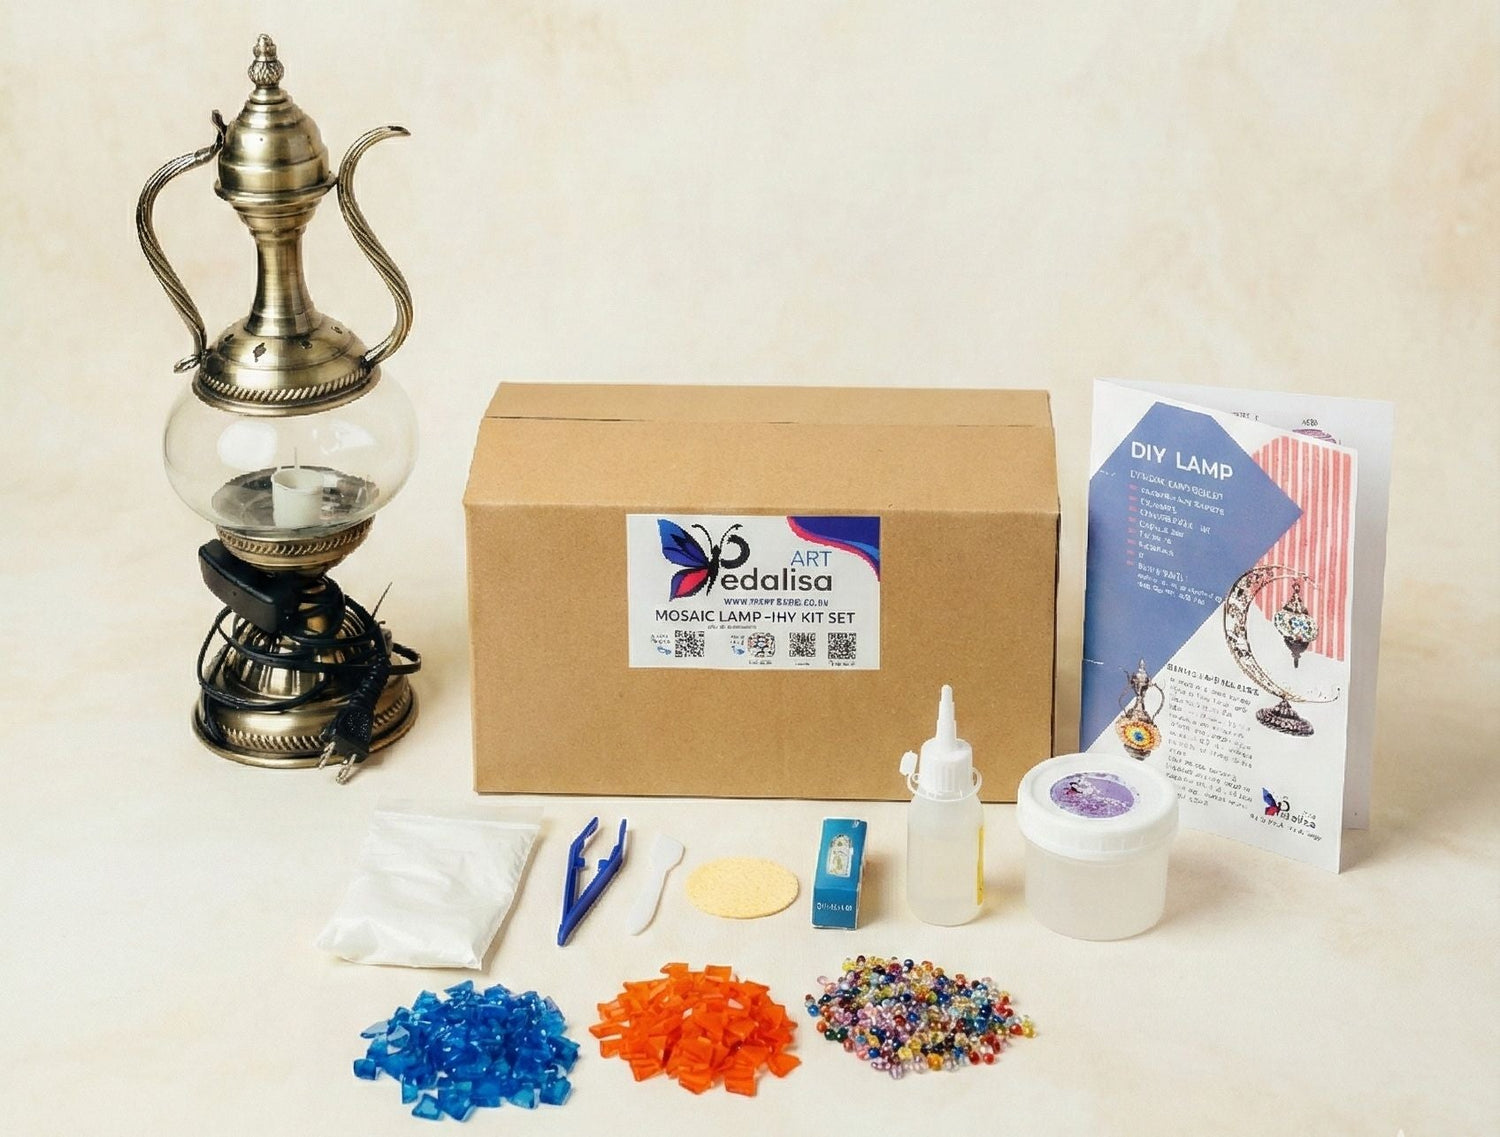
What’s included in a Pedalisa Art DIY mosaic lamp kit?
Our premium DIY kits include everything you need to build a high-quality mosaic lamp: a heat-resistant glass globe, authentic pre-cut mosaic glass pieces, glass beads, specialized silicone adhesive, grout powder, and the metal hardware.
Can I organize a private mosaic lamp workshop?
Yes! We specialize in organizing the perfect mosaic lamp workshop for groups. We frequently collaborate with corporate clients and private parties to provide authentic turkish handmade lamps crafting experiences.